Welcome to my first NanaBananaBike tutorial! If I ever get another great idea worth sharing, I'll try to do this again. For now, please be patient with my Blog-ineptitude and tell me how I can improve this one.
After discovering how easy and fun it was to make an "upholstered" bulletin board, I wanted to make dozens more. I've a stopped at three, but there will be more.
In addition to "easy" and "fun", here are a few more reasons you'll love making one:
- No sewing
- Because size matters, make the board whatever size you like
- There's almost no limit to the decorative looks you can achieve

As you scroll through this tutorial, you'll notice
there are three different bulletin boards featured in the photography.
What can I say? This really is my first rodeo, so I've got a lot to learn
about writing up instructions and using pictures along the way. This
floral board is, in fact, the last one I made for this project and I used it to
fill in some missing steps in the picture story.
Supplies you'll need:
• 1½” thick foam insulation board cut to desired
size. When I bought mine at Home Depot, the nice man with the big saw cut
a 4’x8’ sheet into several smaller bulletin-board sized pieces for me.
Free! Though I'd like to believe it was because I looked
particularly fetching in my sweatpants and Pebbles ponytail, I think it's
really because they do this sort of thing for customers. Bonus: it's much easier to transport after it's been cut up.
• Fabric that is 5” bigger vertically and
horizontally than the dimensions of your foam-board piece (2 ½” all around) .
I've been using both 100% cotton quilting fabric and a cotton/linen
blend. Avoid synthetics, as they might not tolerate the heat used for
fusing. Silk would be interesting.....
• Fusible web (see picture and link below)
• Mounting board: finish-grade lathing or other
board (I used 1"x 4" board on a few bulletin boards and it was fine)
cut about 2" shorter than the width of the bulletin board
• Adhesive caulk to attach mounting board (see
pictures and link below)
• Mounting hardware (see pictures below)
Equipment you'll need:
• Iron
• Ironing board
• Other stuff that need not be mentioned, such as
scissors (or rotary cutter), measuring devices, saw, screwdriver, caulk gun
and Delicious Beverage! of choice
Nice to have:

Here's where I started, with a standard bugly
(butt-ugly) bulletin board that perennially hung crooked above my sewing
table. The cat was able to reach
it whenever he felt he wasn't getting his propers, the favored activity being
stealing thumbtacks. A few times he even knocked the whole thing down,
scraping up the wall in the process. Still, I adore the little beast.

Zipper usually receives proper attention.

New and improved bulletin board and location.
My son made that pencil drawing on the right when he was three. It
depicts me holding up a quilt. Such a treasure! Now he's off to
college and my heart aches for him. More accurately, I miss the idea of
him. Teens are teens, after all, and boys are teens well into their twenties.

Because I didn't take pictures along the way for my
new bulletin board, I made another, smaller one. Yes, I love skull
motifs! Most of the following tutorial shows this board in process.

Favorite fabric. Feel free to pick something
different for your project, though I can't see why you would. This fabric
came from Spoonflower and was printed on cotton/linen canvas. You can order it here: Spoonflower!

Cut 2 ½”extra on all sides (5” added to each
dimension). You'll end up with about 1” wrapped to the back.

"Lite" fusible web works great. There are
several brands (Wonder Under is another popular brand) and you'll find the
product at your local JoAnn's or Hancock's, maybe even Walmart!
Naturally, online sources abound, for example: Heat-n-Bond at Amazon

Attach fusible product to back of fabric per
manufacturer's instructions, making sure to cover the whole piece of fabric.
For larger bulletin boards, you'll need to use more than one width of the
fusible stuff. Affixing them to the fabric one piece at a time, it's better
to overlap the stuff a bit than leave a gap when you attach the second piece.
VERY important: keep the fusible substance off your iron and
ironing surface. The stuff is nasty when it gets on your iron. This
is where Iron Cleaner and Teflon Pressing Sheets come in handy. If it gets
on your ironing surface, it's only a matter of time before it's on your iron
and then your favorite underwear. But WHY are you ironing your underwear?
That's just creepy!

Peeling away the paper backing. Note
"glue" is now on the fabric.

Use a ruler to help position the foam-board exactly
in the center of the glue-backed fabric (glue side up!). The overhang
should be about 2 ½” on all sides.

Secure one long edge of the fabric to the back side of the foam board with painter's tape. Do NOT fuse anything yet! Turn the board over, keeping the fabric taut along the edge that was taped.

Now here's a tricky part that I couldn't find a
good way to photograph: Fusing the fabric to the front! Above is an embarrassing graphic representing the front of the bulletin board to
illustrate my words.
With your iron pre-heated to silk/wool*, fuse
fabric to the front of the bulletin board, working from the edge that has been
anchored with tape on the back. Move at a moderate pace, sliding the iron
2-3 inches per second, smoothing the fabric with your other hand to prevent
ripples.
Work in small segments, rather like the sequence shown on the drawing. After the front has been
fused to the foam, gently fuse the sides, always smoothing with your hands and pulling the fabric taut.
*Fusible web manufacturer may recommend hottest or
cotton setting. Don't do it! You'll get nice fusion with the cooler
iron and be less likely to melt the foam and stink up the house.

All four sides have been fused, leaving the corner
un-fused (open).

Now crease the open corner and begin to wrap it
around the corner, folding as you go. See the next two pictures.


Repeat for all four corners.

Fuse the corners and the fabric that's been wrapped
to the back. It won't all fuse because there are areas where the
non-glued side of the fabric touches itself. See the next step.

Use fabric glue in areas that don't fuse.
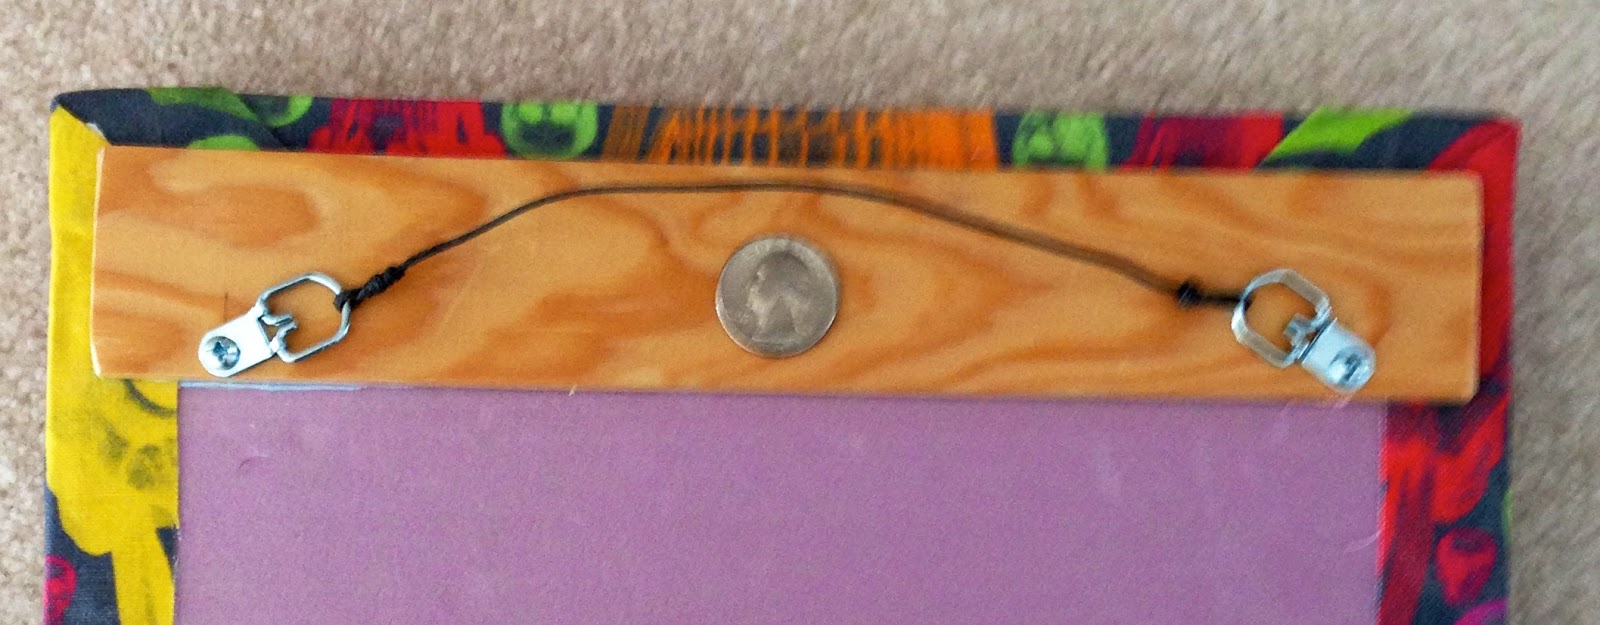
A mounting board stabilizes the foam board and
gives you a place to attach the mounting hardware. The coin is there for scale.

Caulk gun
adhesive that won't melt the foam, available everywhere! PL 300 Foamboard Adhesive at The Home Despot or Amazon, or probably your local hardware
store. The mounting board is cut 2" shorter than width of bulletin
board. Here I've used a fine bit of 1" x 4" board, but finish-grade
lath board, as shown in the previous picture works very well and is easier to cut.

Mounting board has been caulked and set in place.
Use a ruler to make sure it's even. Here I mounted the board
3" from the upper edge.

Weight the board while the caulking cures.
The board on the left is NOT attached, it is just there to stabilize the
weight during cure time. The cat goes where he wishes.

Tubes of caulk, once they are opened, dry out
quickly. Cram a bit of plastic wrap into the tip of the caulk tube to
keep it from drying out before you get around to making the next bulletin
board. I used a retracted Bic ballpoint for the cramming step.
And that's all, folks!